In the previous post GPTReview part 2, we created our own AI-based code reviewer using GPTScript and GitHub actions. We configured an action on a repository in a way that would trigger every new PR. We called our GPTScript to review the changes made in the code and provide feedback as comments in the PR.
While GitHub actions are widely used, Jenkins is a popular CI/CD tool in many organizations. And I’m sure you’d also want automated code review to be a part of your Jenkins CI/CD pipeline.
In this blog post, we’ll integrate our AI-based code reviewer, built using GPTScript, into a Jenkins CI/CD pipeline.
GPTReview in Jenkins
Jenkins is one of the most widely used CI/CD tools, and hence, adding an automated code review step into your Jenkins pipeline is helpful as it helps developers get feedback faster.
Pre-requisites
- An OpenAI API Key.
- GitHub repository.
- Jenkins – we have our instance running on our AWS cloud.
- GPTScript and GH CLI installed on the system running Jenkins.
Writing the GPTScript
The first step is to create the GPTScript. Since GPTScript is written primarily in natural language, writing the script to perform code review is easy. Below is the gptreview.gpt file:
Name: Code Reviewer
Description: A tool to help you perform code review of open PRs
Context: learn-gh
Tools: sys.exec, sys.http.html2text?, sys.find, sys.read, sys.write
Args: PR_URL: The GitHub PR_URL

You have the gh cli available to you. Use it to perform code review for a pr from the $(repo) provided.
Perform the following steps in order:
1. Identify the files changed in the pull request ($PR_URL) using the pr number and perform a diff.
    1. Analyze the complete code of each identified file and perform a detailed line by line code review.
    2. Repeat the process for each changed file in the pr.
2. Share your review comments separately for each file.
3. In a new line write "Code: Approved" or "Code: Require Changes" based on the review comments.
---

Name: learn-gh
Description: A tool to help you learn gh cli

#!/usr/bin/env bash
echo "The following is the help text for the gh cli and some of its sub-commands. Use these when figuring out how to construct new commands.  Note that the --search flag is used for filtering and sorting as well; there is no dedicate --sort flag."

gh --help
gh repo --help
gh pr --help
gh pr checkout --help
gh pr diff --help
Let us understand what the script does:
- The script takes a "–PR_URL" parameter, which is the URL for the pull request. It takes this from the environment variable set by the GitHub action.
- It identifies the files changed in the pull request and performs a code review for the changed file.
- Based on the code review, it writes "Code: Approved" or "Code: Require Changes"
You can find this GPTScript in our examples folder.
Configuring Jenkins
The next step is to configure Jenkins. We need to perform three tasks:
- Install required plugins
- Create a Pipeline
- Configure the “Open_AI_API” and “GH_TOKEN” environment variables
Install required plugins
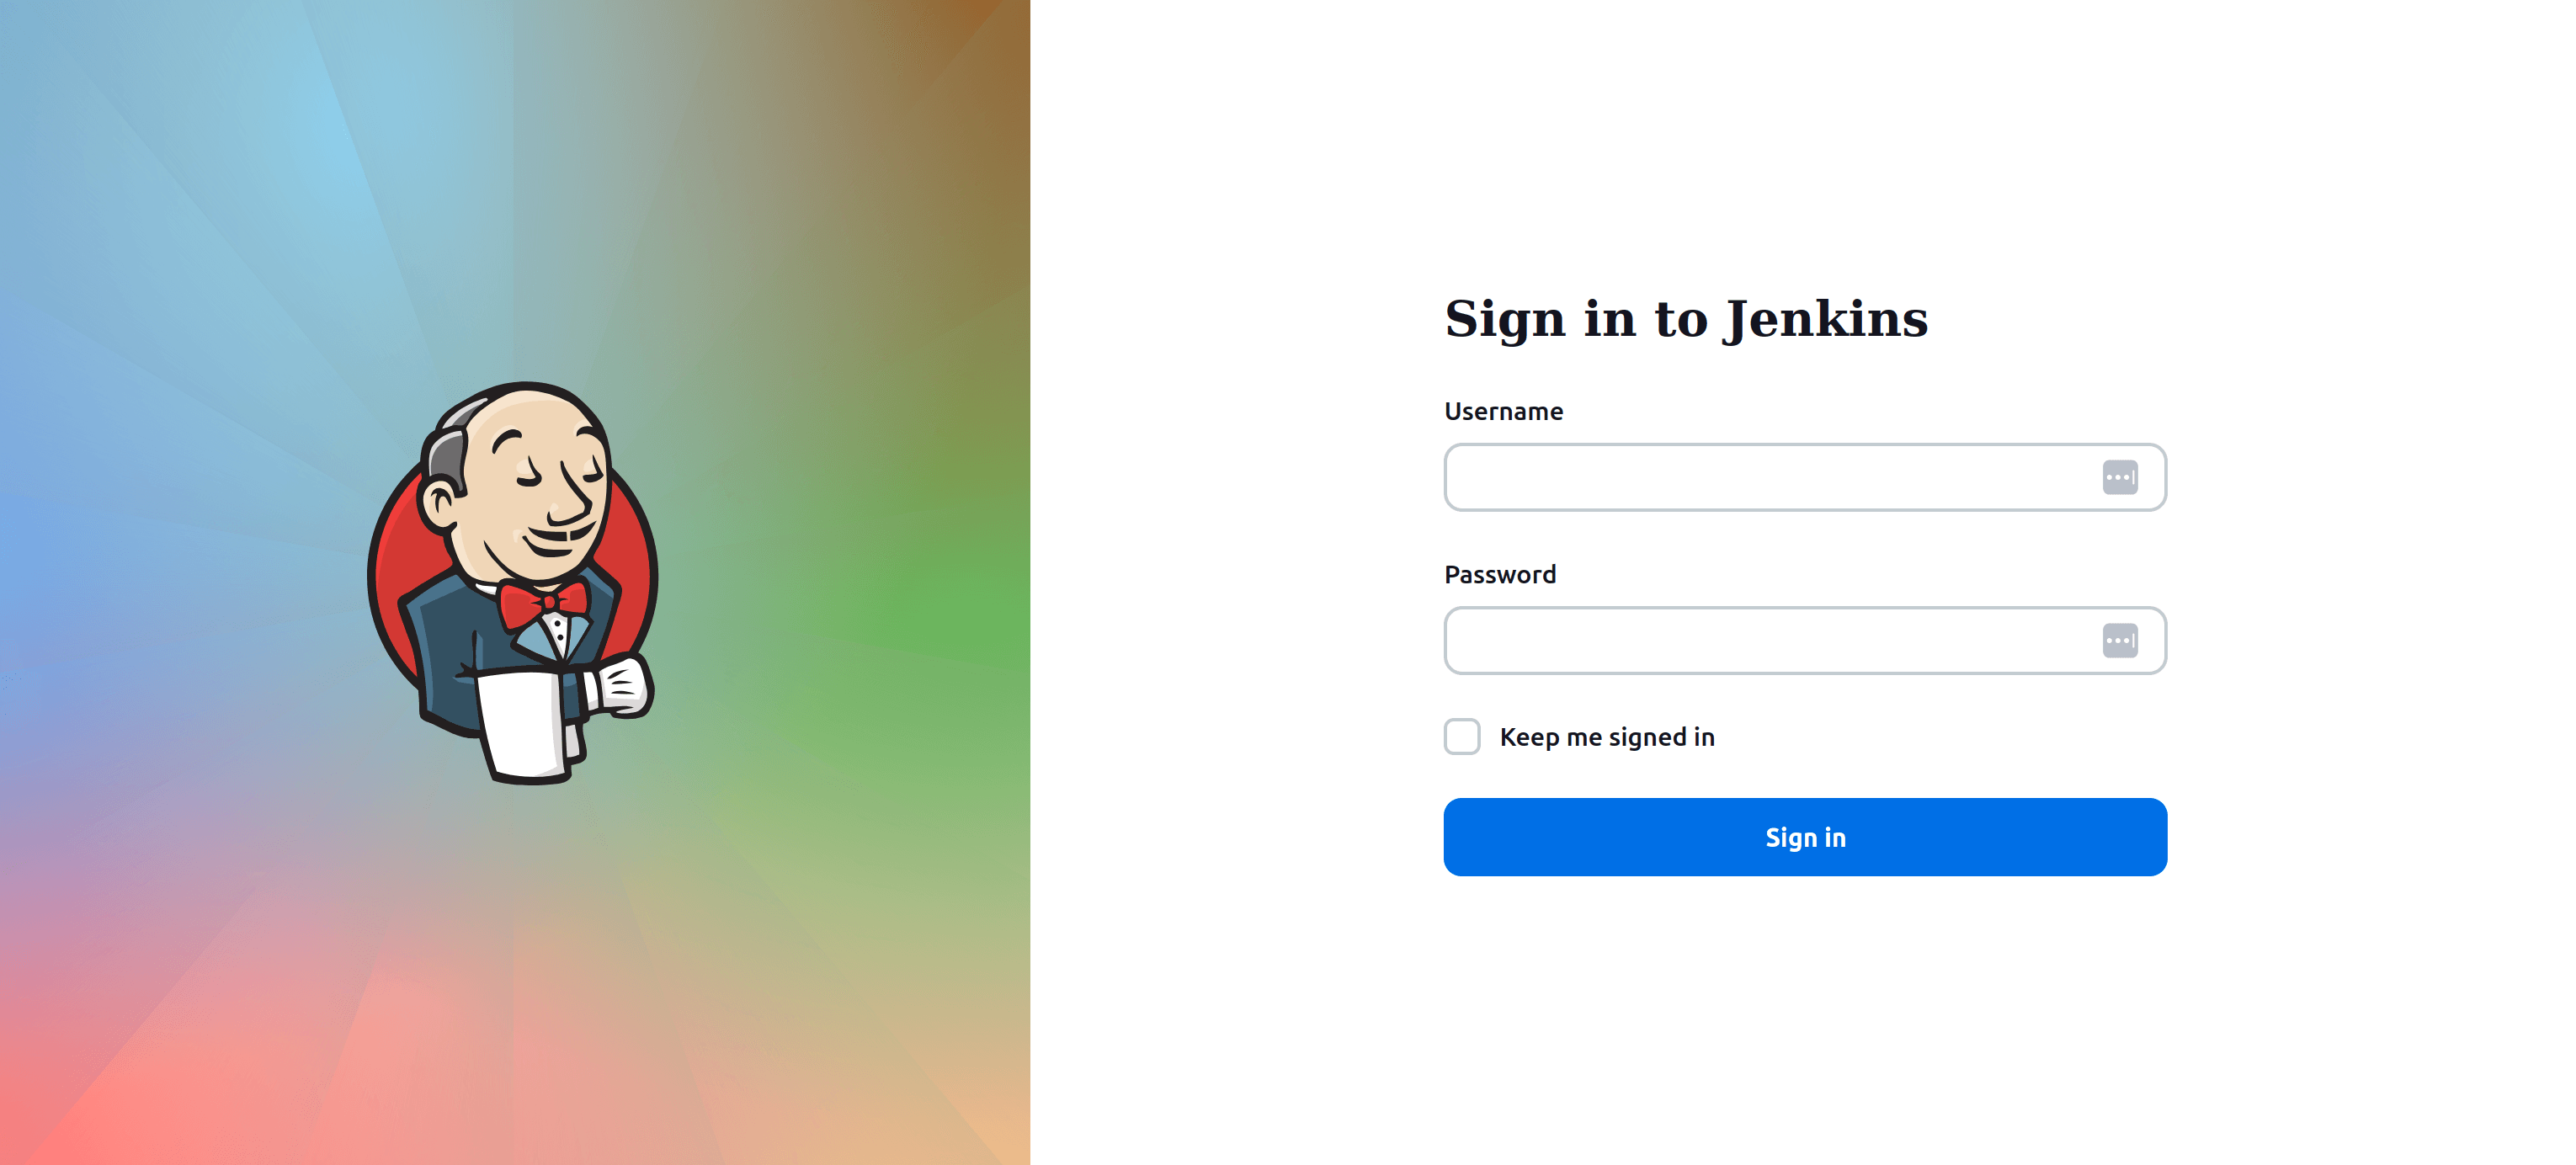
Log in to your Jenkins instance along with the default credentials. In our case, this was the AWS EC2 IP address – https://<public_ip>:8080.
As for the credentials, the username is “user”, and you can get the password from “/var/jenkins_home/secrets/initialAdminPassword”
Click on Manage Jenkins and navigate to plugins section.
In Available plugins, Search for “Generic Webhook Trigger Plugin” and click on Install if not installed already. Similarly install the HTTP Request Plugin.
Create a Pipeline
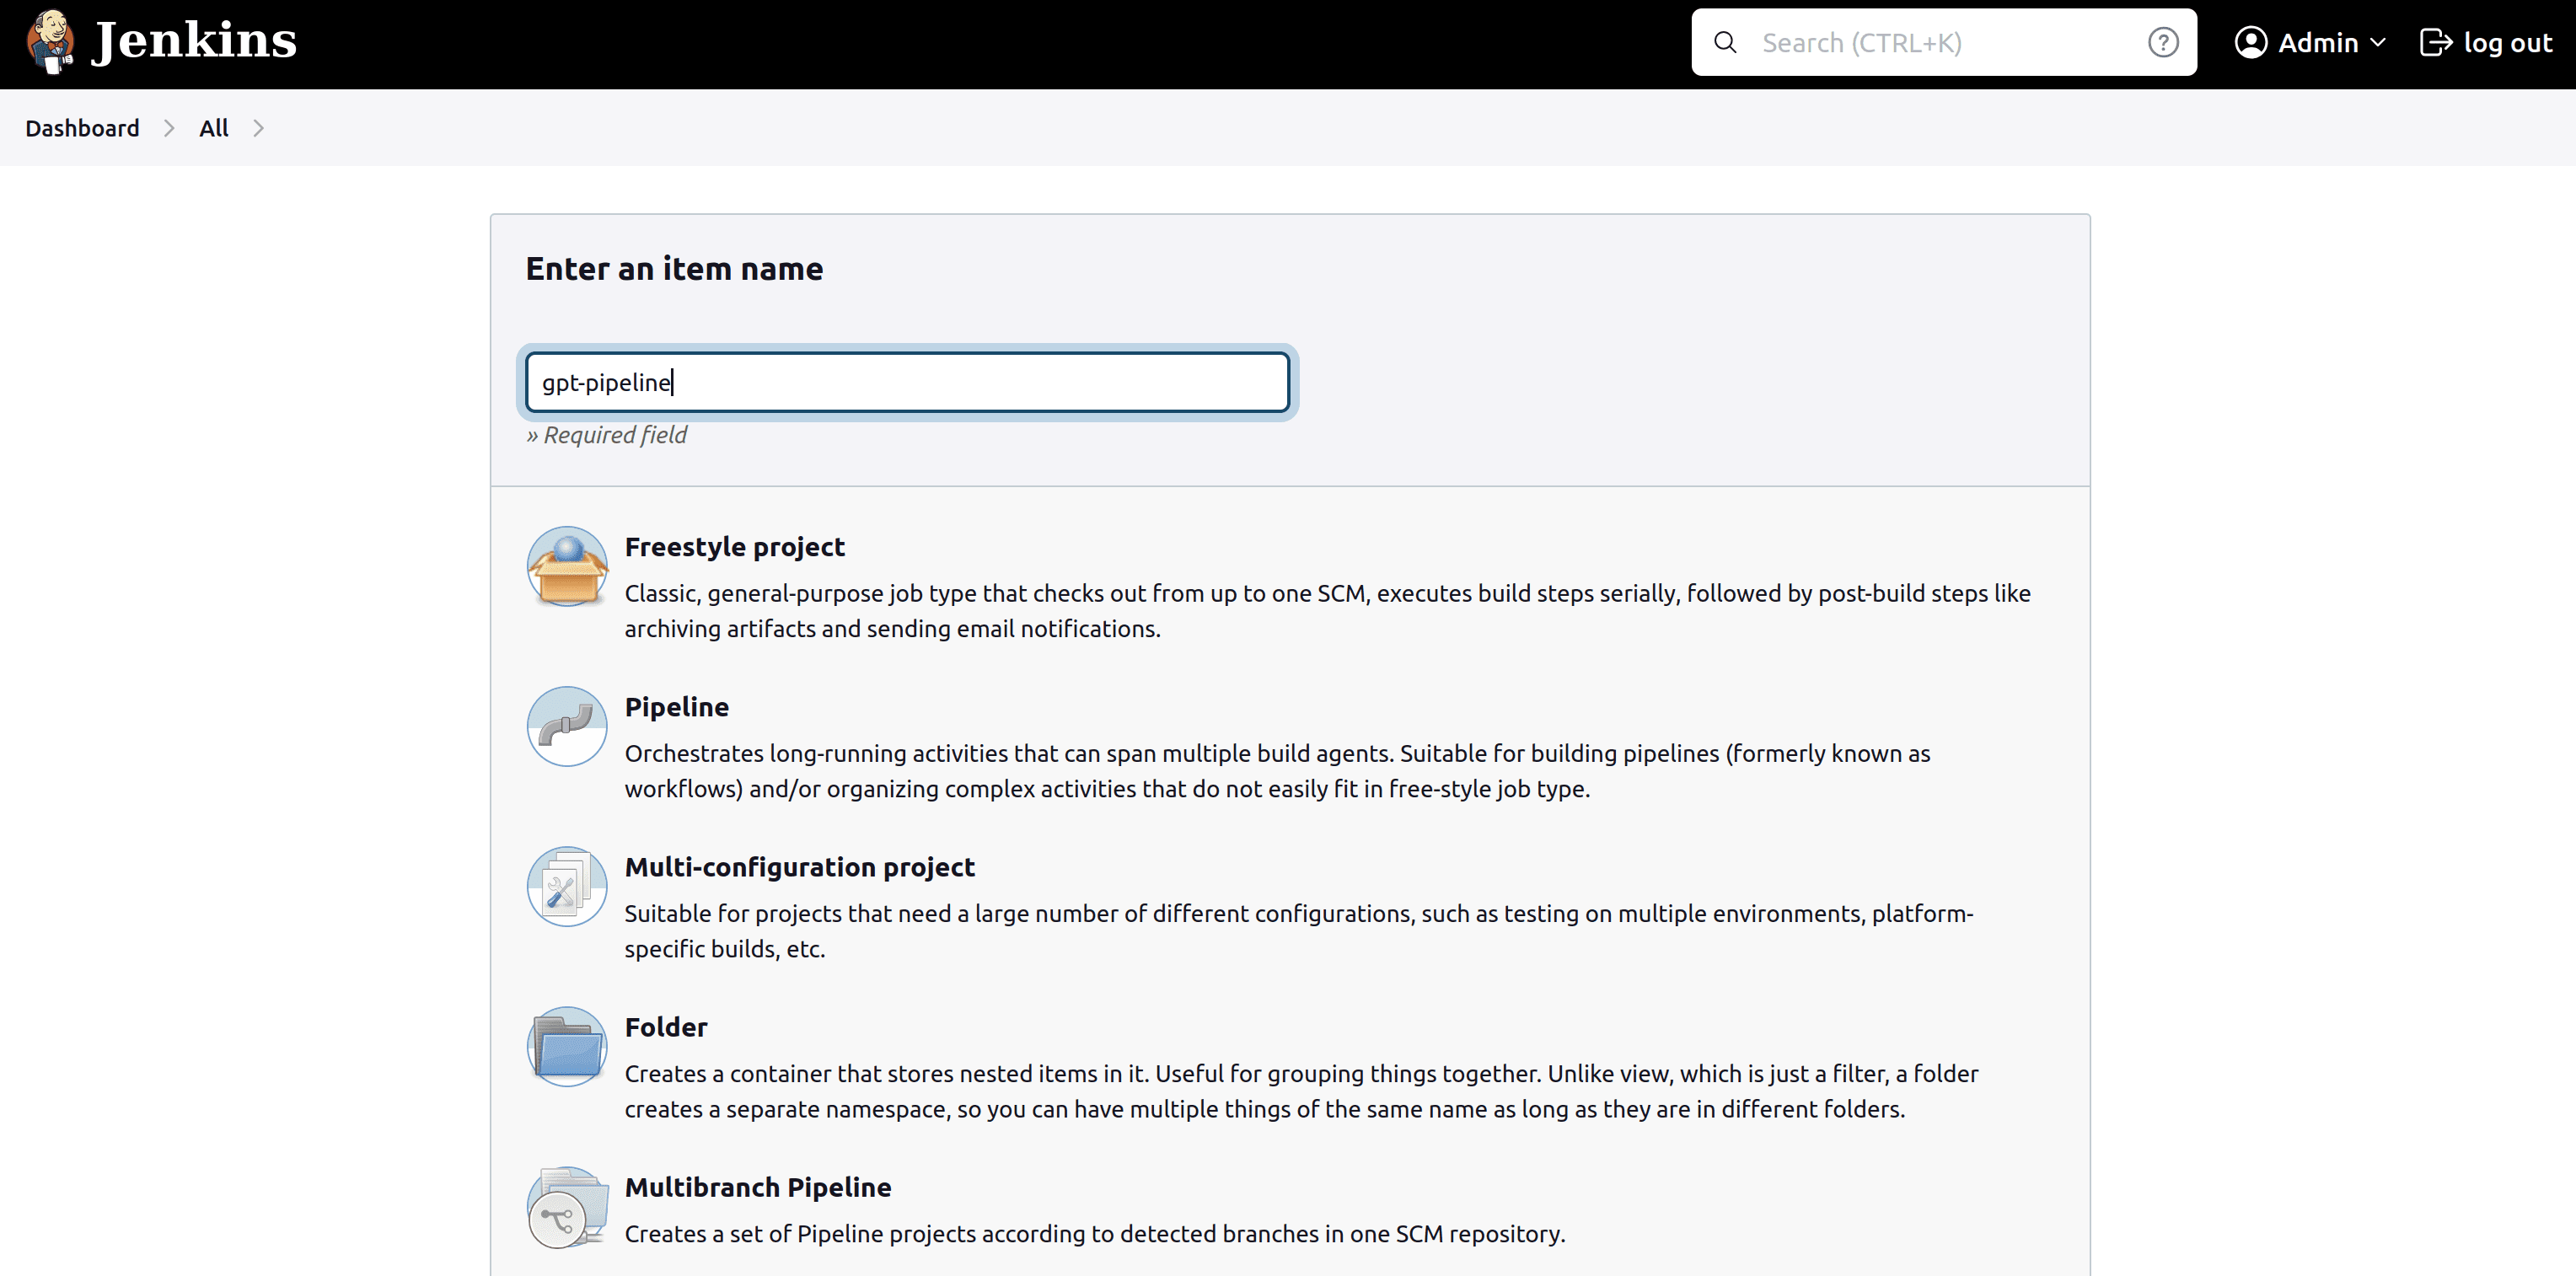
To create a new pipeline, from the dashboard, click on “New Item” and choose “Pipeline” and follow the steps mentioned below:
- Provide a unique name for the project pipeline
- Configure general project settings
- Provide a description
- Configure build trigger:
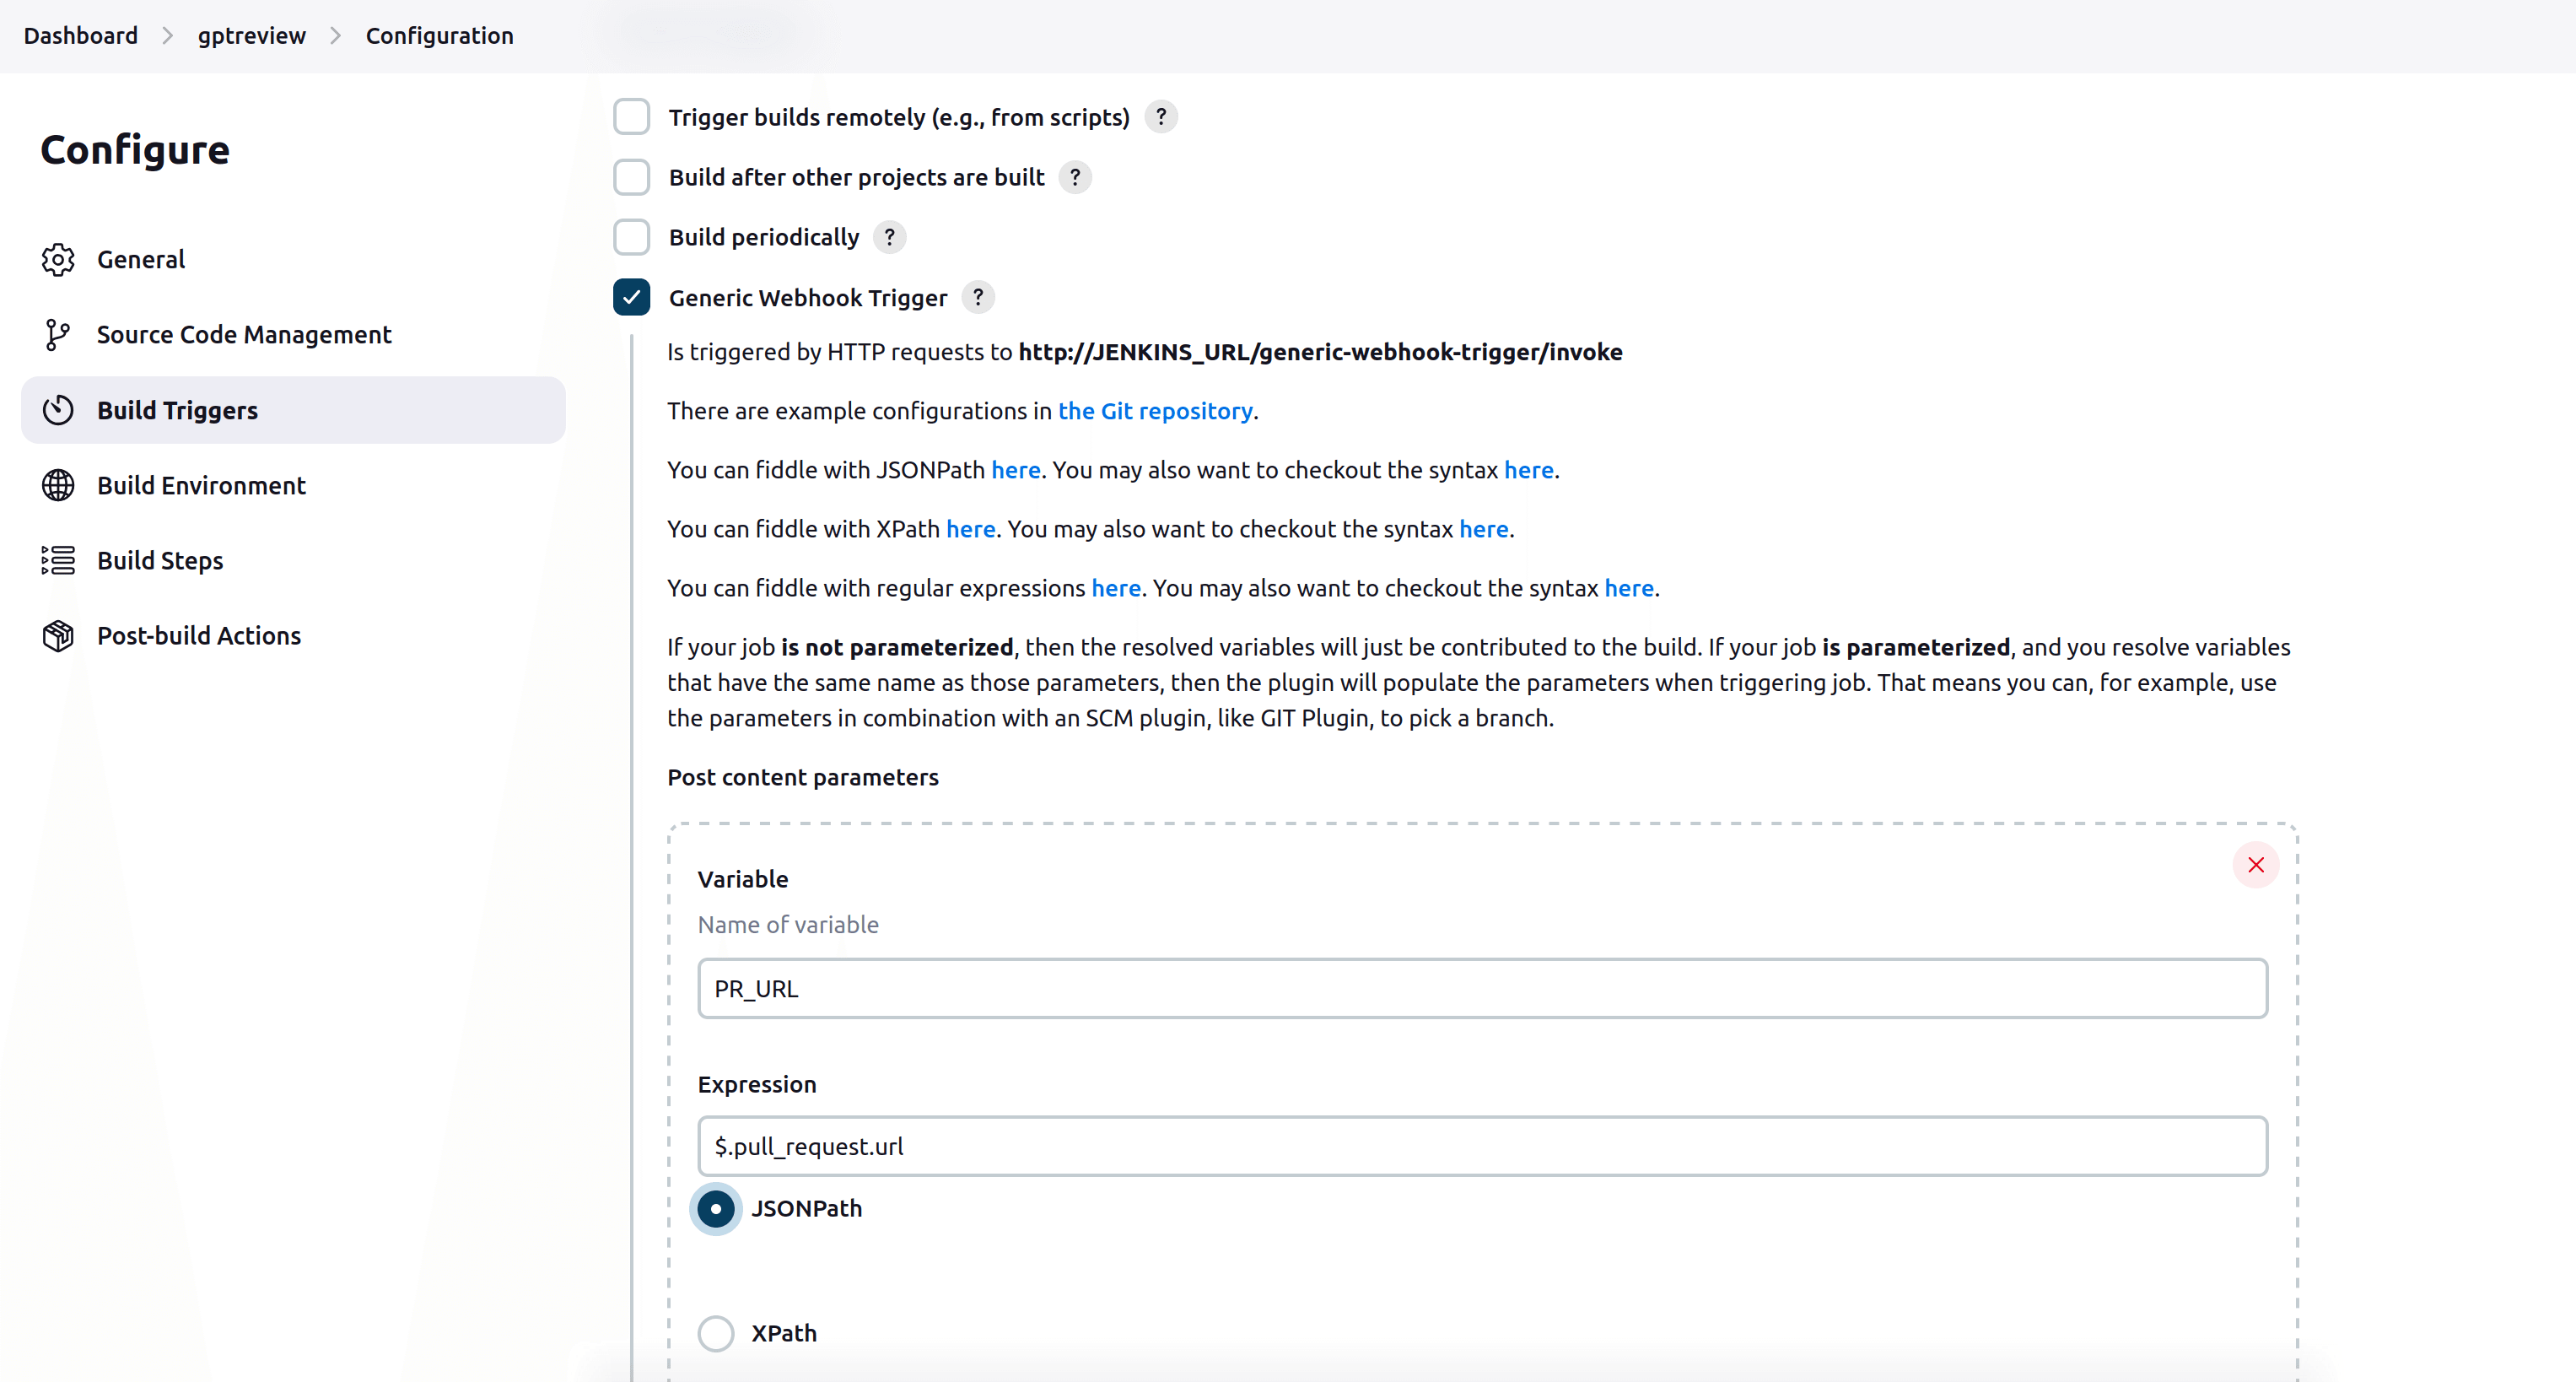
- Navigate to Build Triggers Section and Check the Generic Webhook Trigger option.
- Under “Post content parameters” section, add a new variable.
- Provide “PR_URL” as Name and “$.pull_request.url”** **as Expression and select JSONPath. This is done to fetch the GitHub PR URL from GitHub.
- Click Add and add 2 more variables with “PR_NUMBER” as Name, “$.number” as expression and “PR_COMMENTS_URL” as Name and “$.pull_request.comments_url” as expression.
-
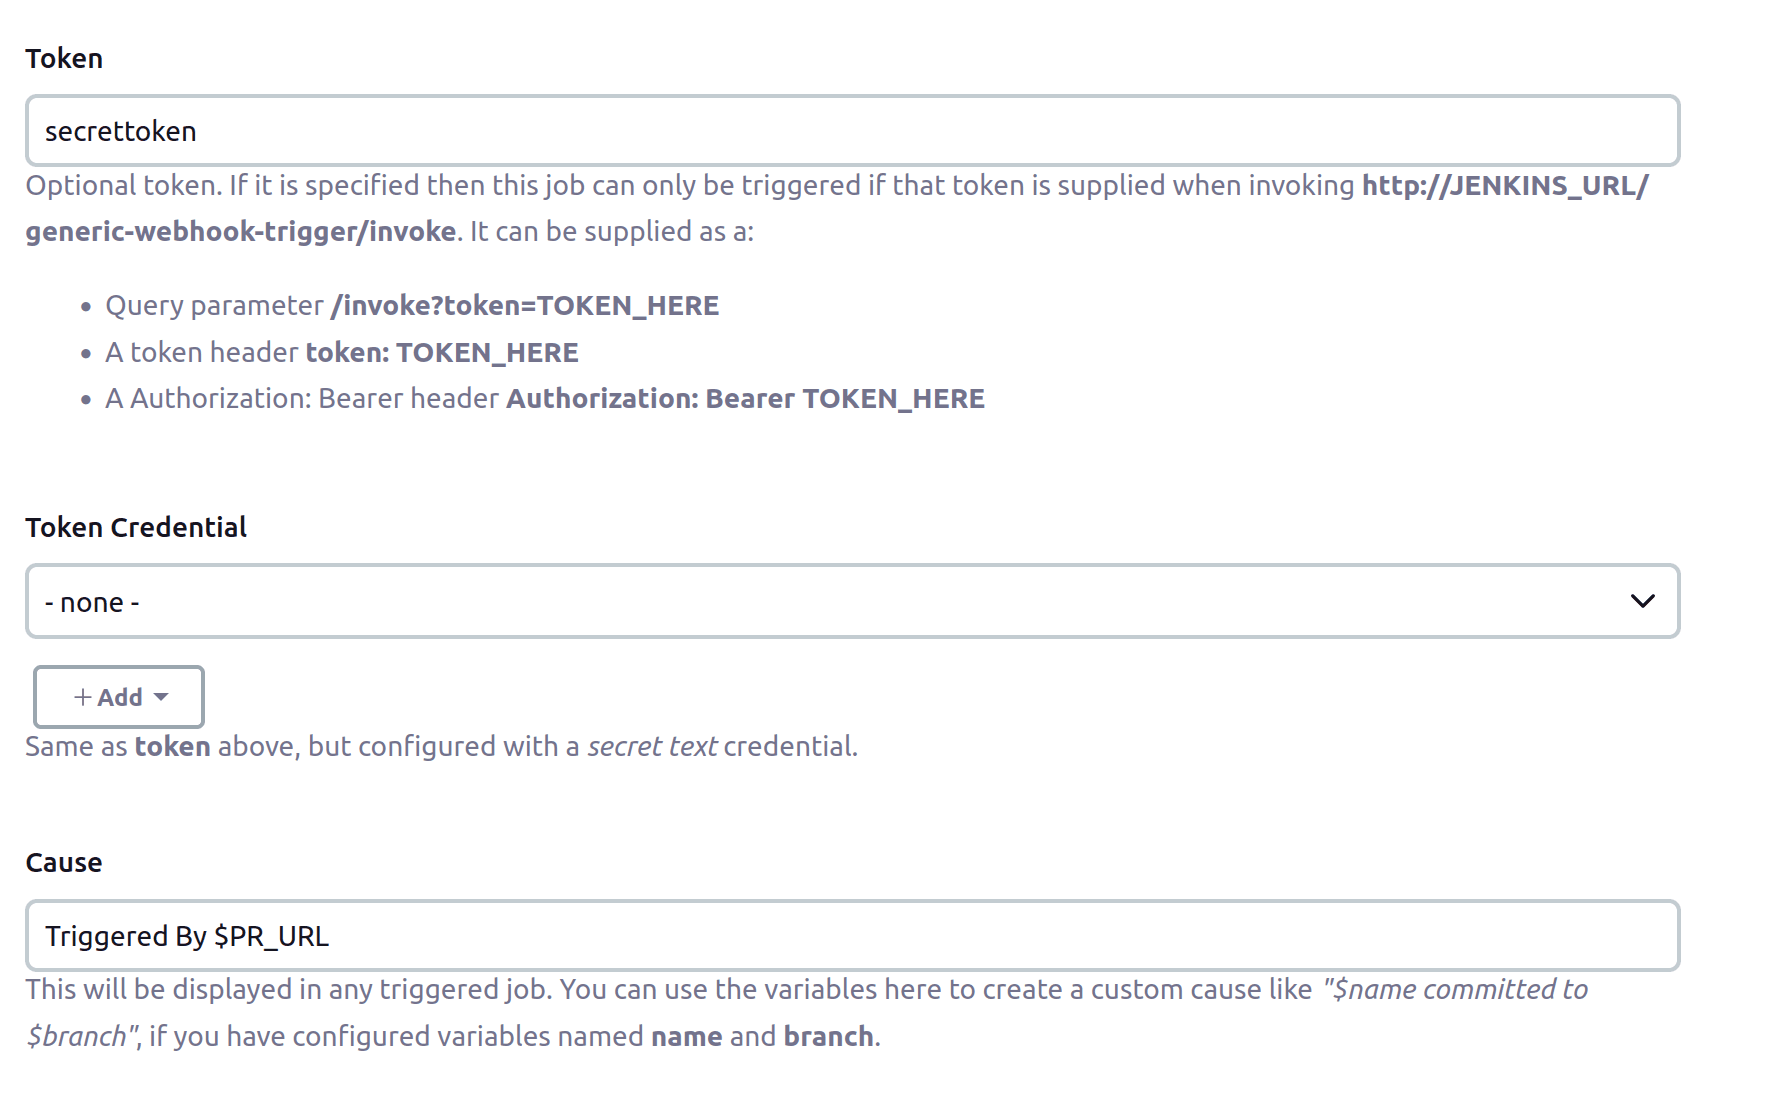
Scroll down to the Token section and give a random secret token that needs to be passed with Webhook. Without a token, you need to create a set of credentials to be able to trigger a job.
-
Scroll down to the Cause section and add “Triggered by $PR_URL” in the Cause section. This will show up in the console informing that the build was “Triggered by <PR_URL>”
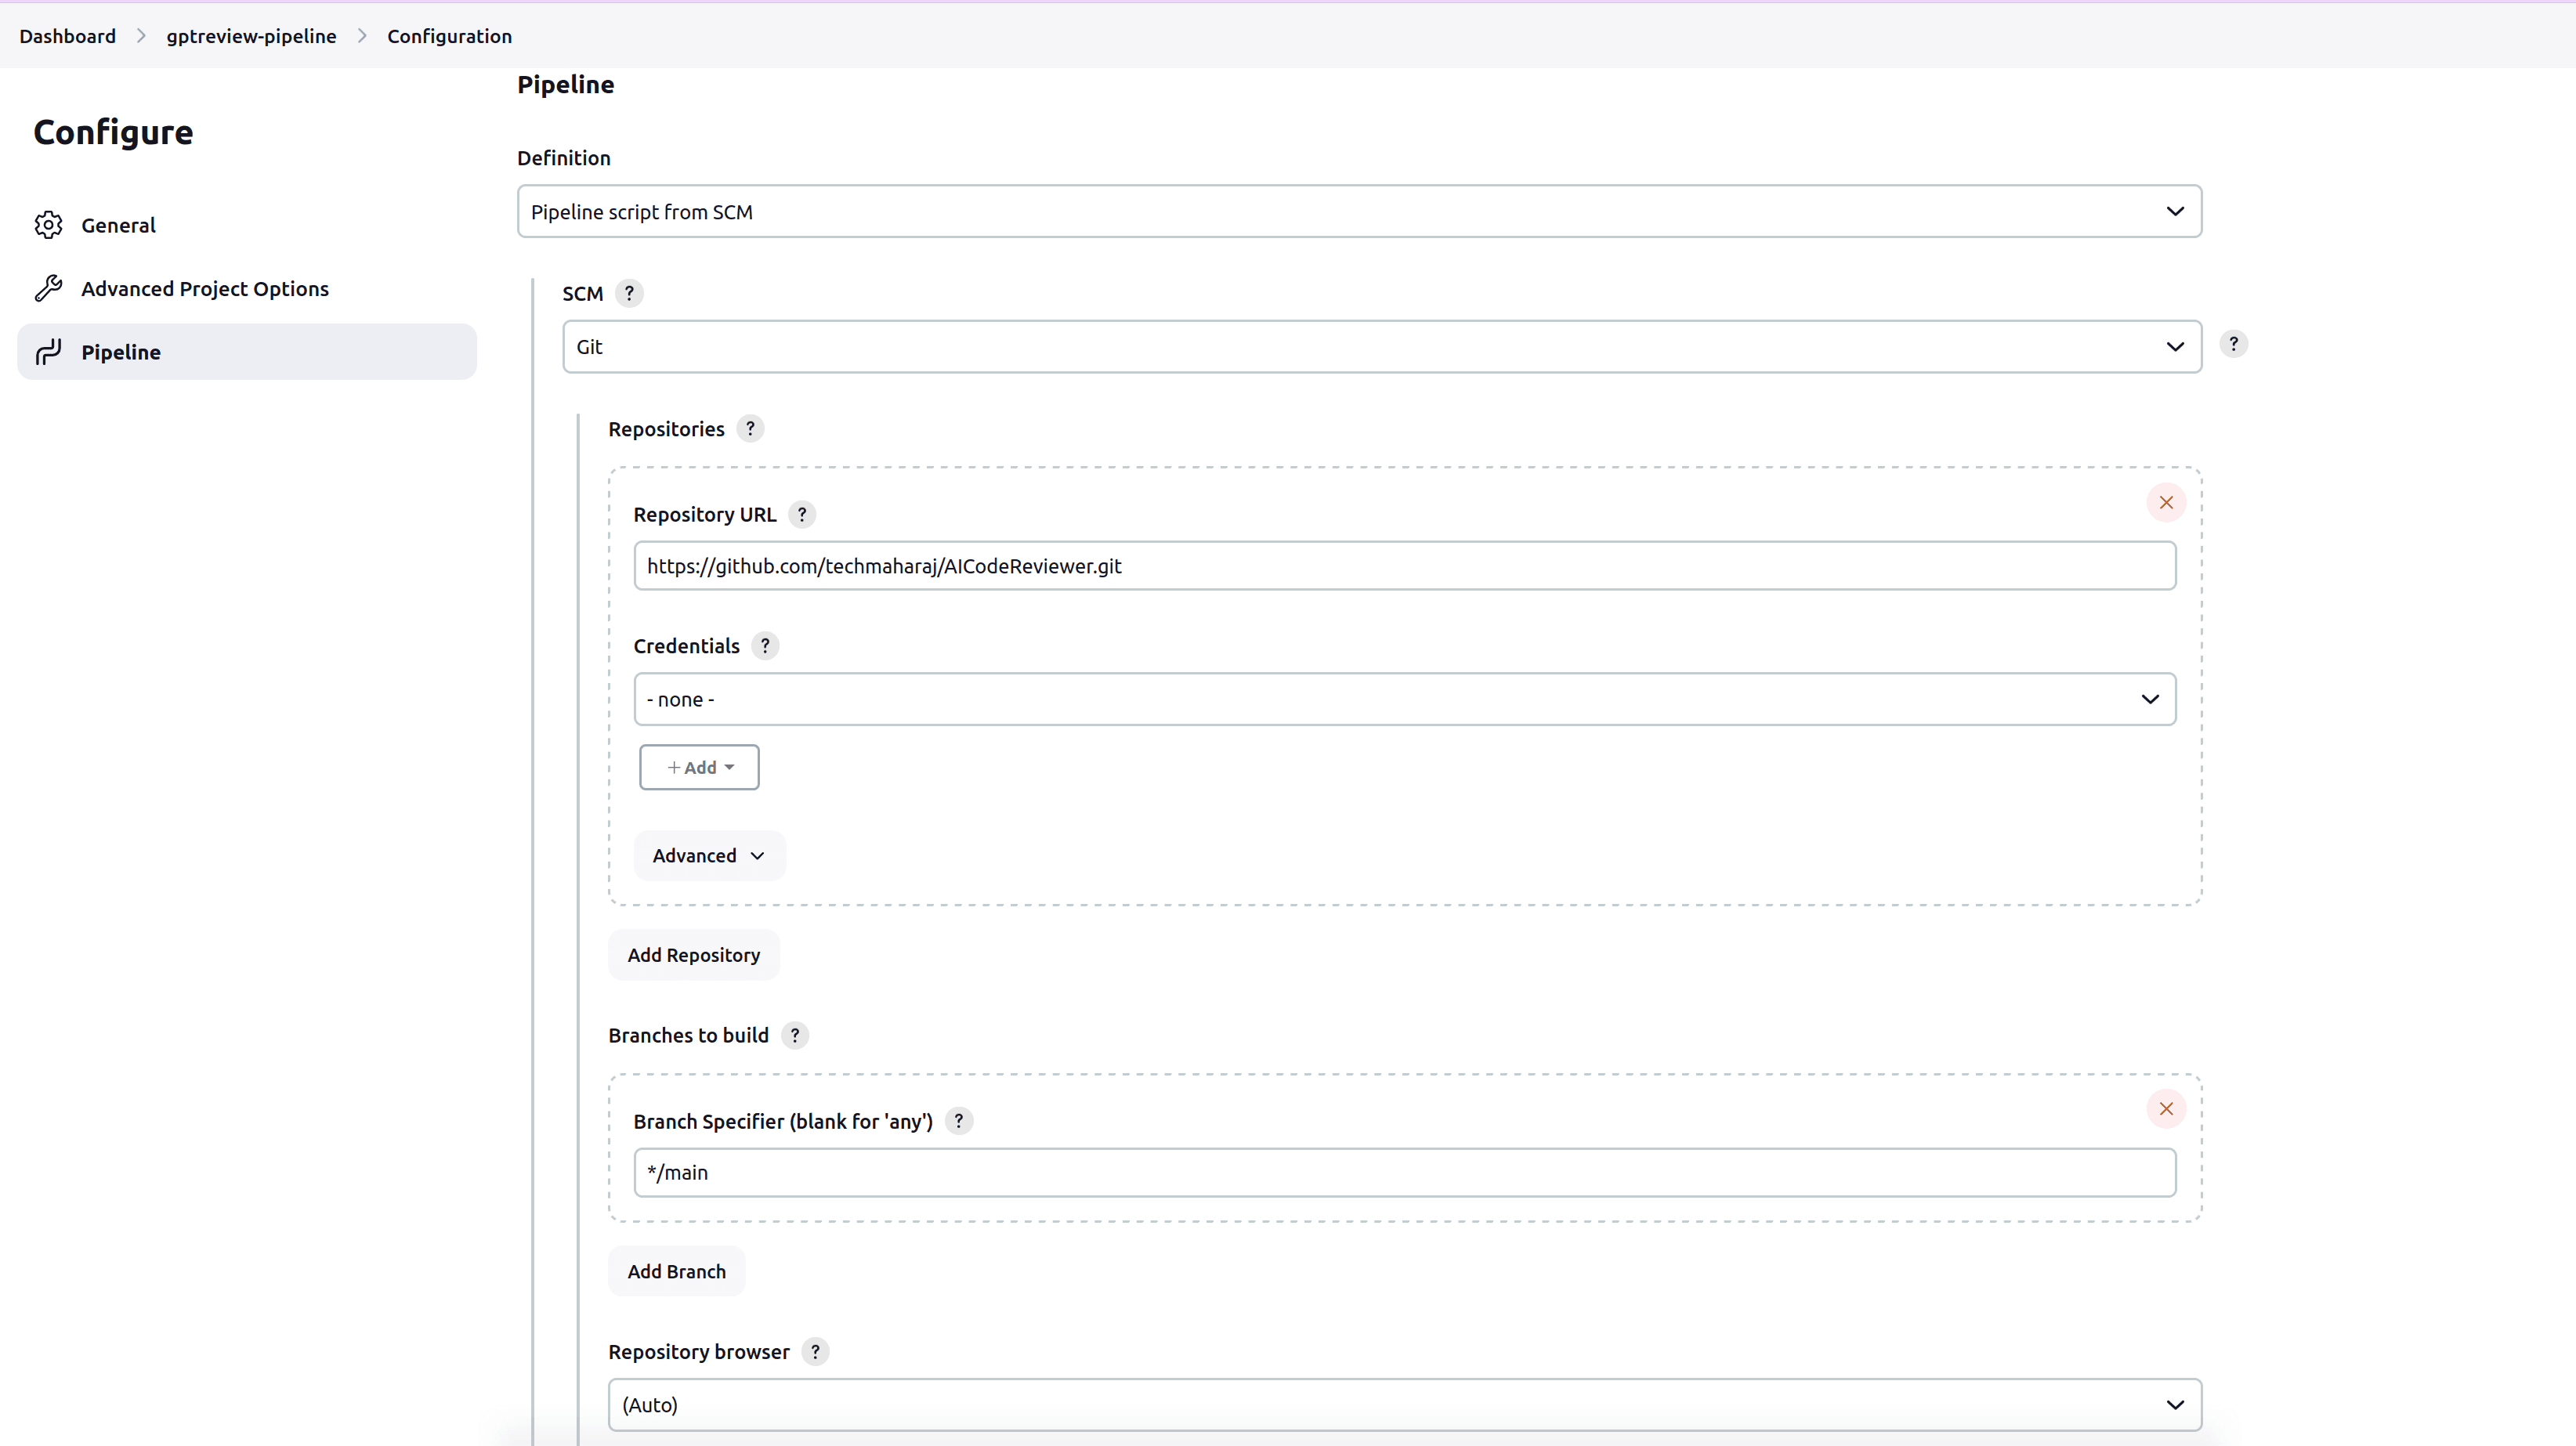
- Scroll to the “Pipeline” section an under “Definition” choose “Pipeline script from SCM”. Under “SCM” select “Git”, under repositories provide the path to the repository.
- Specify the branch in “Branches to build“ section, for main branch, enter “*/main”.
- Scroll down to “Script Path” and type “Jenkinsfile” – we will create a new Jenkinsfile in the root of our GitHub repository.
- Save the Pipeline
Configure Environment variable
For the Jenkins pipeline to execute correctly, run our GPTReview script and post comments to GitHub PR, we need to configure two environment variables, OPENAI_API_KEY and GH_TOKEN. Let us see how to do that.
- Navigate to “Manage Plugins” & “credentials
- Under “System”, select “Secret Text” & provide a unique ID as “OPENAI_API_KEY” & provide Open API key in secret text.
- Similarly create one more Secret Text where the unique ID is “GH_TOKEN” & provide Github token in secret text.
Configuring GitHub
Setting up Webhook
For our Jenkins to trigger a build based on code pushes to our GitHub repository, we need to connect GitHub with Jenkins. In this case, we can use webhooks. Webhooks enable secure communication between GitHub and Jenkins and allow us to trigger builds.
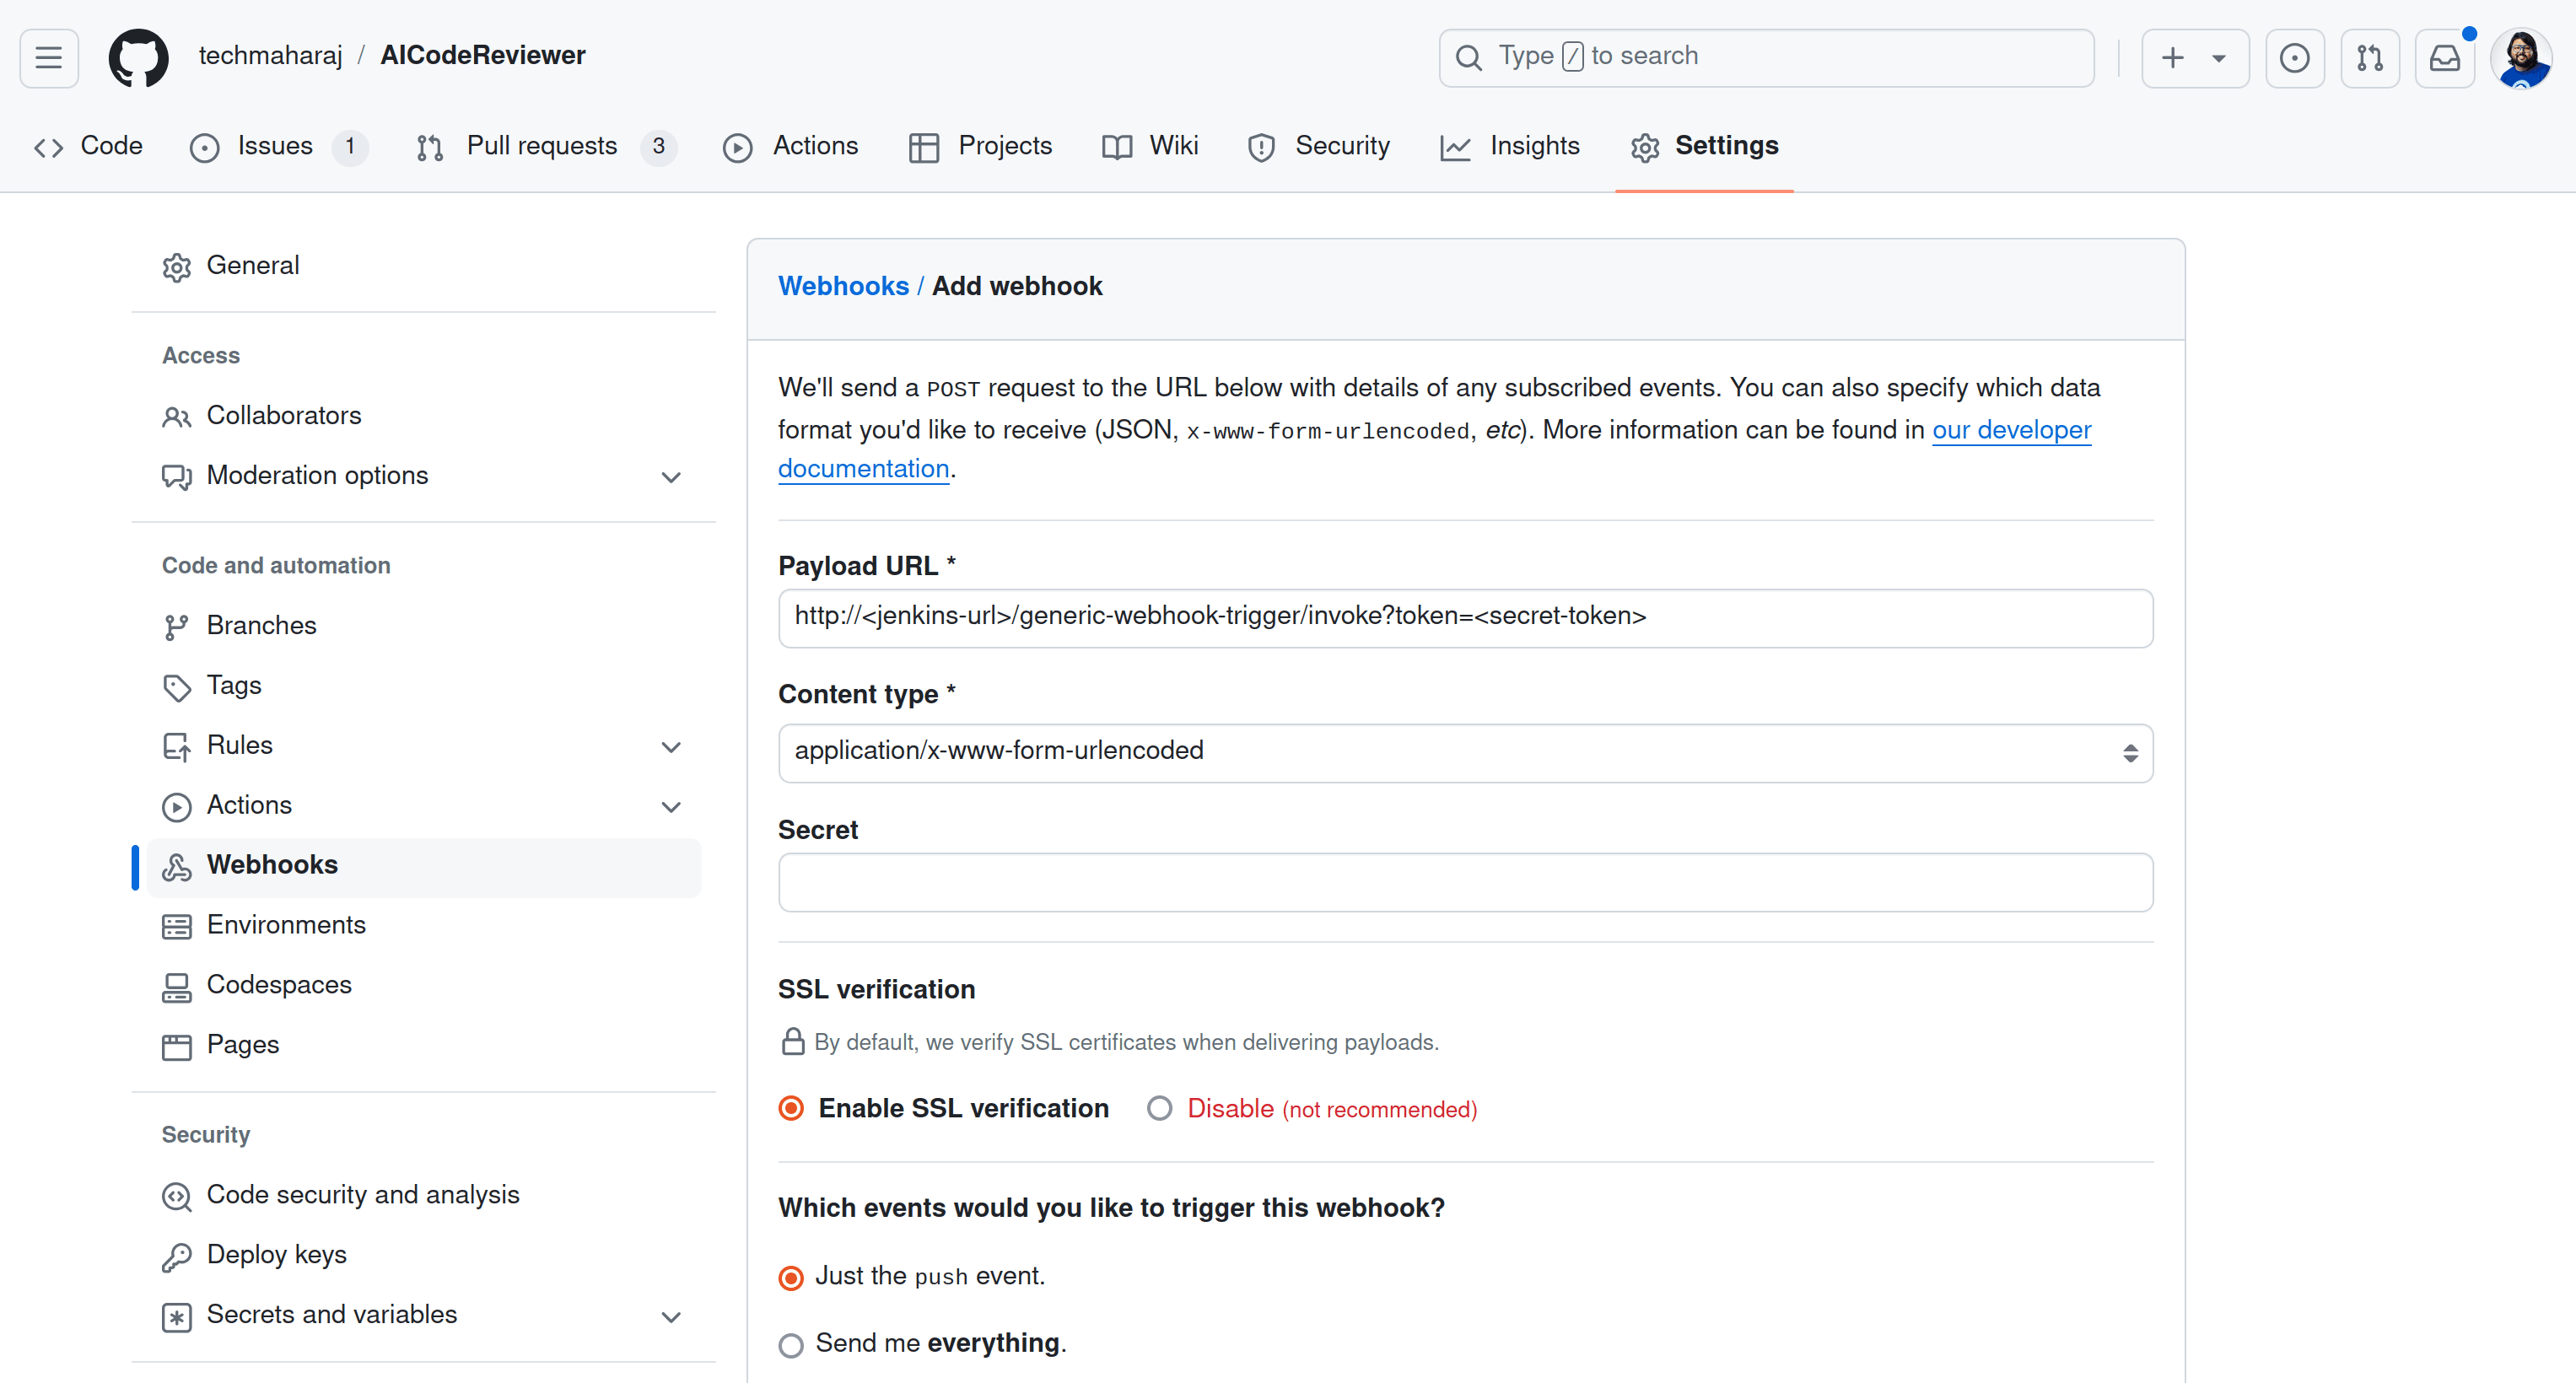
Navigate to the “Settings” tab for your repository, click on “Webhooks” from the left menu and add a new webhook.
Provide the following details to configure a webhook:
-
Payload URL: Replace the payload URL with the following URL
http://<jenkins-url>/generic-webhook-trigger/invoke?token=<secret-token>
where jenkins-url is URL for jenkins and <secret-token> is a secret-token that we used while creating the Jenkins pipeline. -
Content Type: application/json
-
Scroll down to and click on “let me select individual events” and check “Pull requests” only, this ensures that the webhook is triggered only when a pull requested related event takes place.
Click on “Save” to save the webhook. If everything is correct, you should see a success status for the webhook delivery on GitHub.
With this our Jenkins and GitHub are configured and events are successfully being passed. Let’s go ahead and create the Jenkinsfile that will instruct Jenkins on what to do.
Create Jenkins file
In the root of your repository, create a new file “Jenkinsfile” and add the following content.
pipeline {
	agent any
	stages {
    	stage('Clean Workspace') {
        	steps {
            	deleteDir()
        	}
    	}

    	stage('GPT Review') {
        	steps {
            	script {
                	checkout([
                    	$class: 'GitSCM',
                    	branches: [[name: '*/main']], // Specify branch if needed
                    	userRemoteConfigs: [[
                        	url: '' //Replace with your own repository URL
                    	]]
                	])

                	withCredentials([string(credentialsId: 'OPENAI_API_KEY', variable: 'OPENAI_API_KEY')]){
                    	withCredentials([string(credentialsId: 'GH_TOKEN', variable: 'GH_TOKEN')]) {

                        	// GPTSCript reviews the code
                        	REVIEW = sh(script: "gptscript codereview.gpt --PR_URL=${PR_URL}", returnStdout: true).trim()

                        	// Construct the JSON payload using Groovy's JSON library
                        	def jsonPayload = groovy.json.JsonOutput.toJson([body: REVIEW])

                        	// Post the review comment to the GitHub PR
                        	sh "curl -H "Authorization: token ${GH_TOKEN}" -H "Content-Type: application/json" -X POST -d '${jsonPayload}' '${PR_COMMENTS_URL}'"

                	}
                	}
            	}
        	}
    	}

    	stage('Check PR Status') {
        	steps {
            	script {

                	// Check if REVIEW contains 'Require Changes'
                	if (REVIEW.contains('Require Changes')) {
                    	echo 'Code Requires Changes'
                    	currentBuild.result = 'FAILURE' // Mark the build as failed
                    	error 'Code Requires Changes' // Terminate the build with an error
                	}


                	// Check if REVIEW contains 'Approved'
                	if (REVIEW.contains('Approved')) {
                    	echo 'Code Approved'
                	}
            	}
        	}
    	}
	}
}
Let us understand what this Jenkinsfile does:
- It specifies three stages, “Clean Workspace”, “GPT Review” and “Check PR Status”.
- The “GPT Review” stage starts by checking out the main branch from the repository specified. It then performs the code review using the OPENAI_API_KEY and GH_TOKEN that we specified in Jenkins
- It takes the output of the code review comments and creates a Json payload that is sent as a comment to the GitHub PR.
Now that we have the webhook and Jenkinsfile in place, let us go ahead and execute the GPTScript.
Executing the GPTScript
To execute this workflow, create a new PR with some code changes. Here we will add a add.py file with the following content.
a=input("Enter the first number: ")
b=input("Enter the second number: ")
sum=int(a)+int(b)
print("Sum is: "+str(sum))
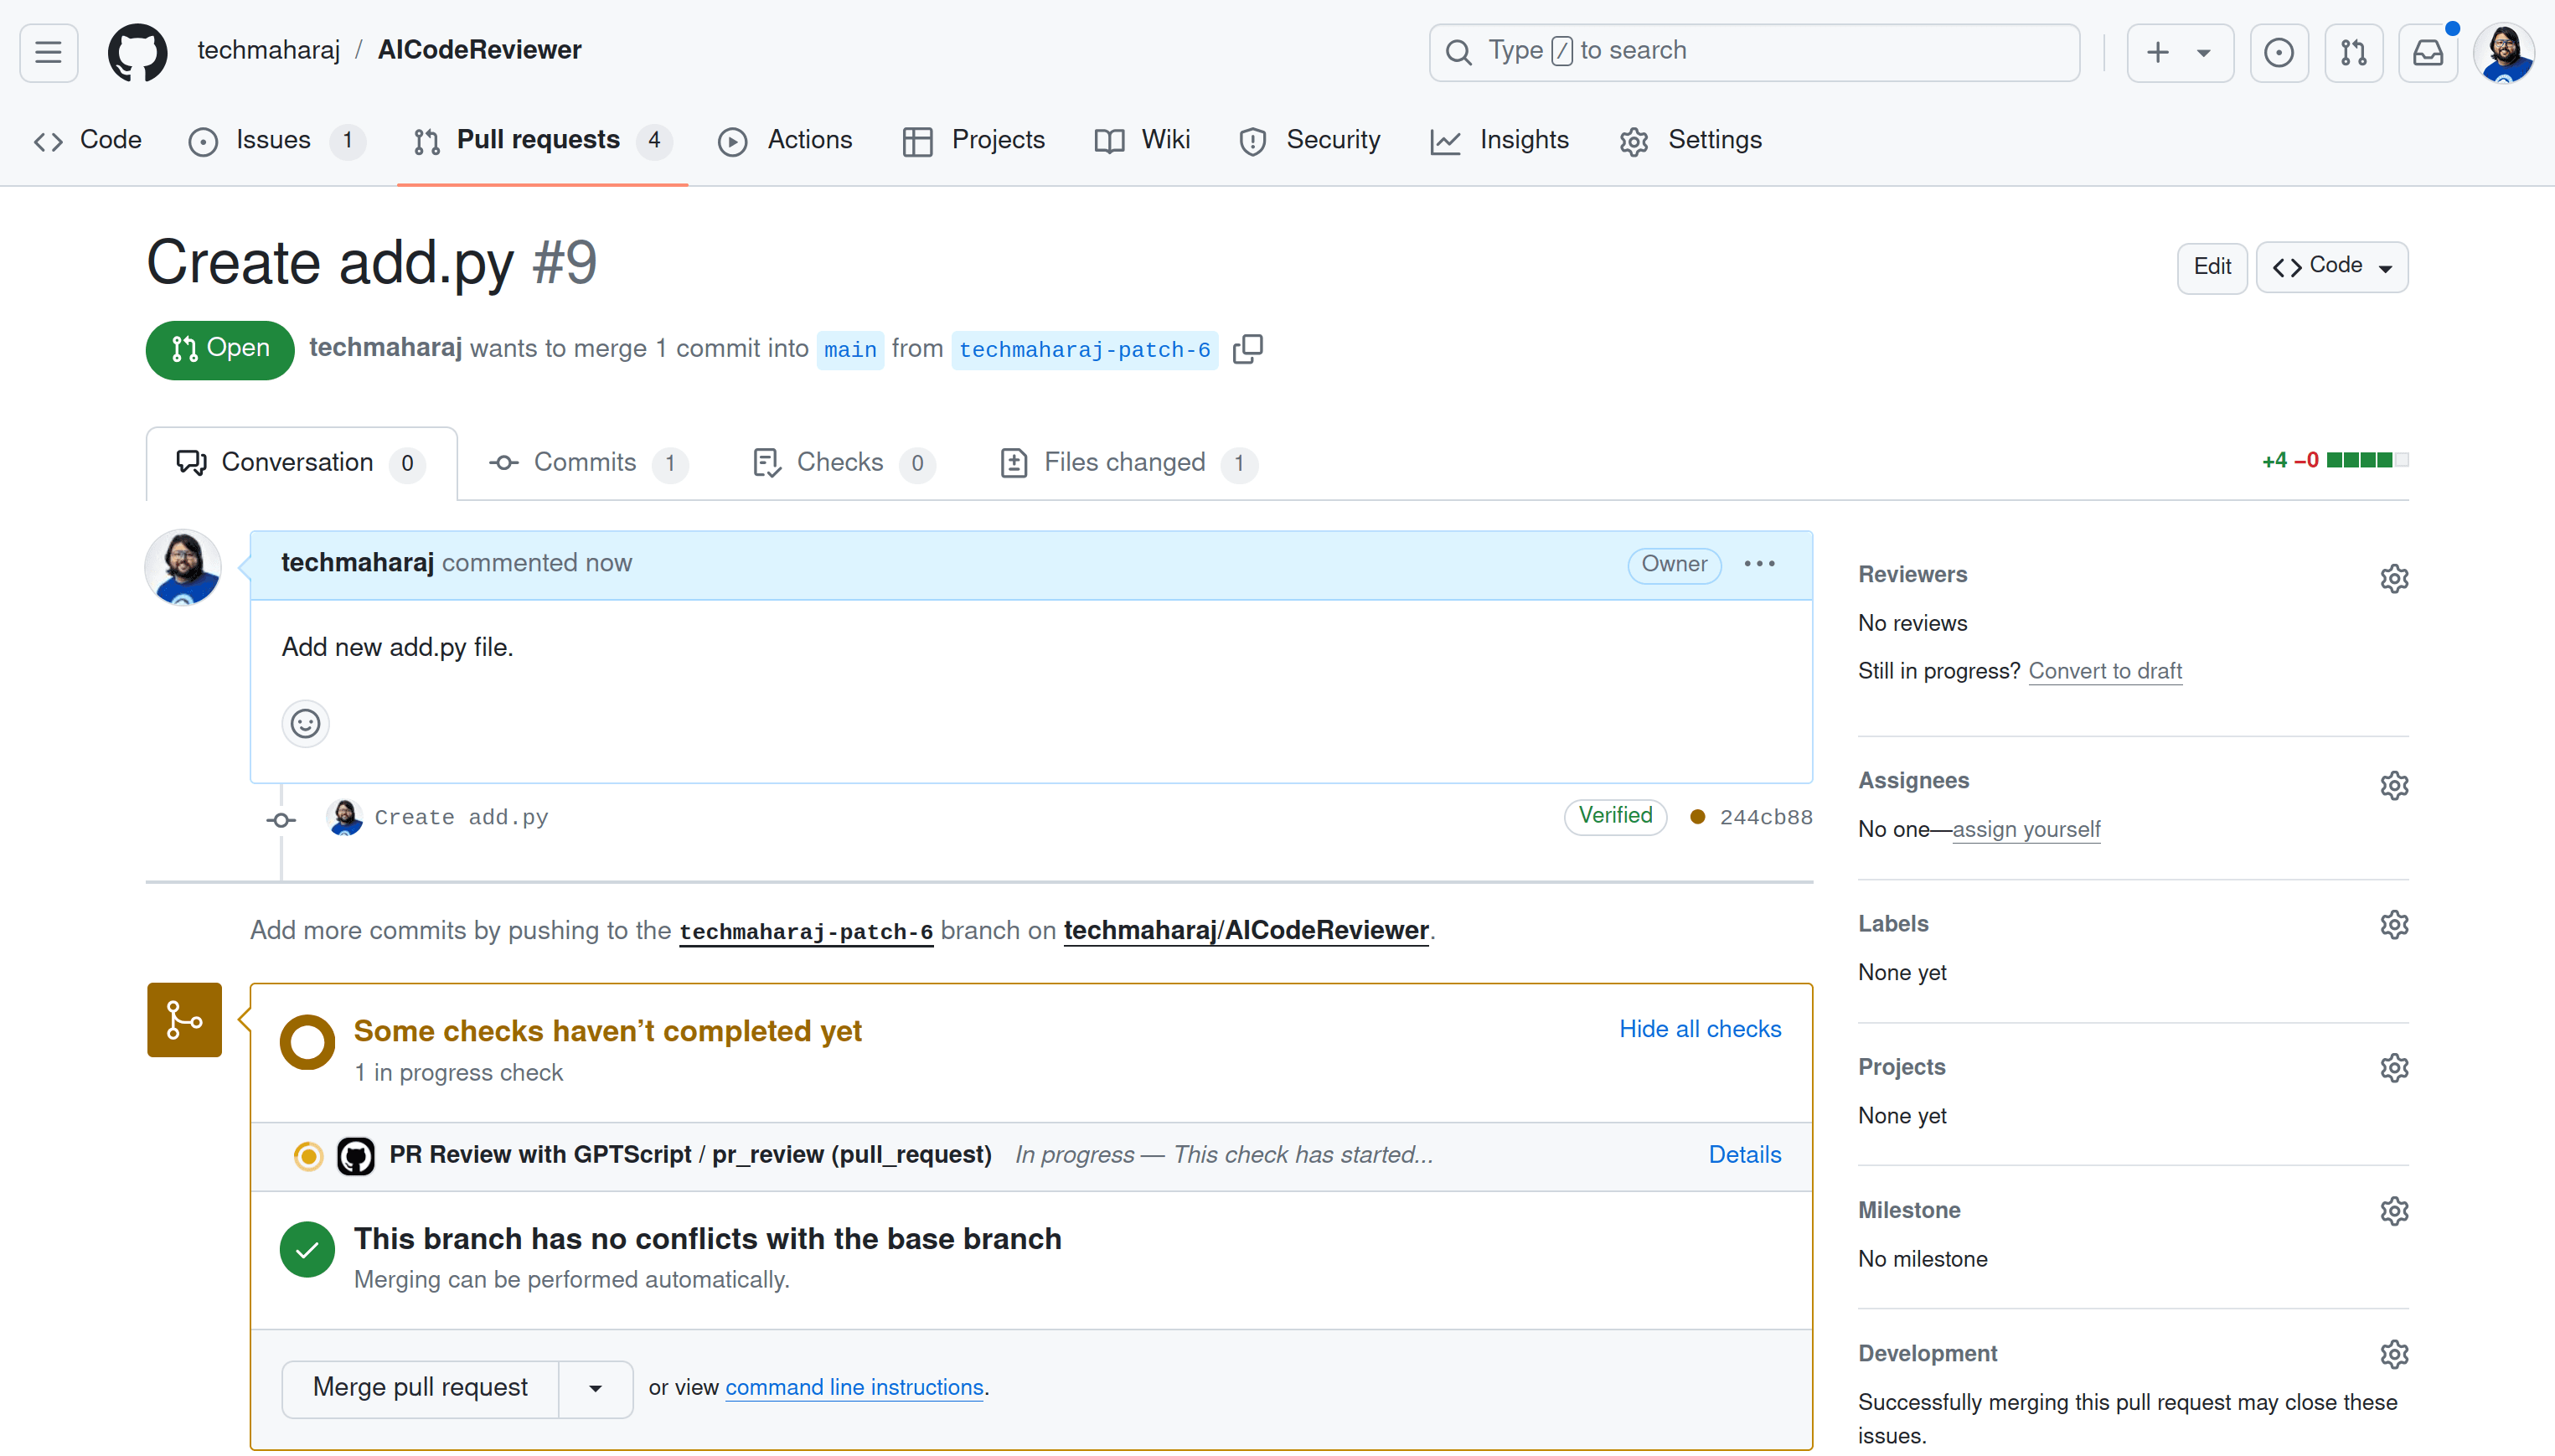
This python program adds two numbers by taking inputs for the user. Let use go ahead an create the PR.
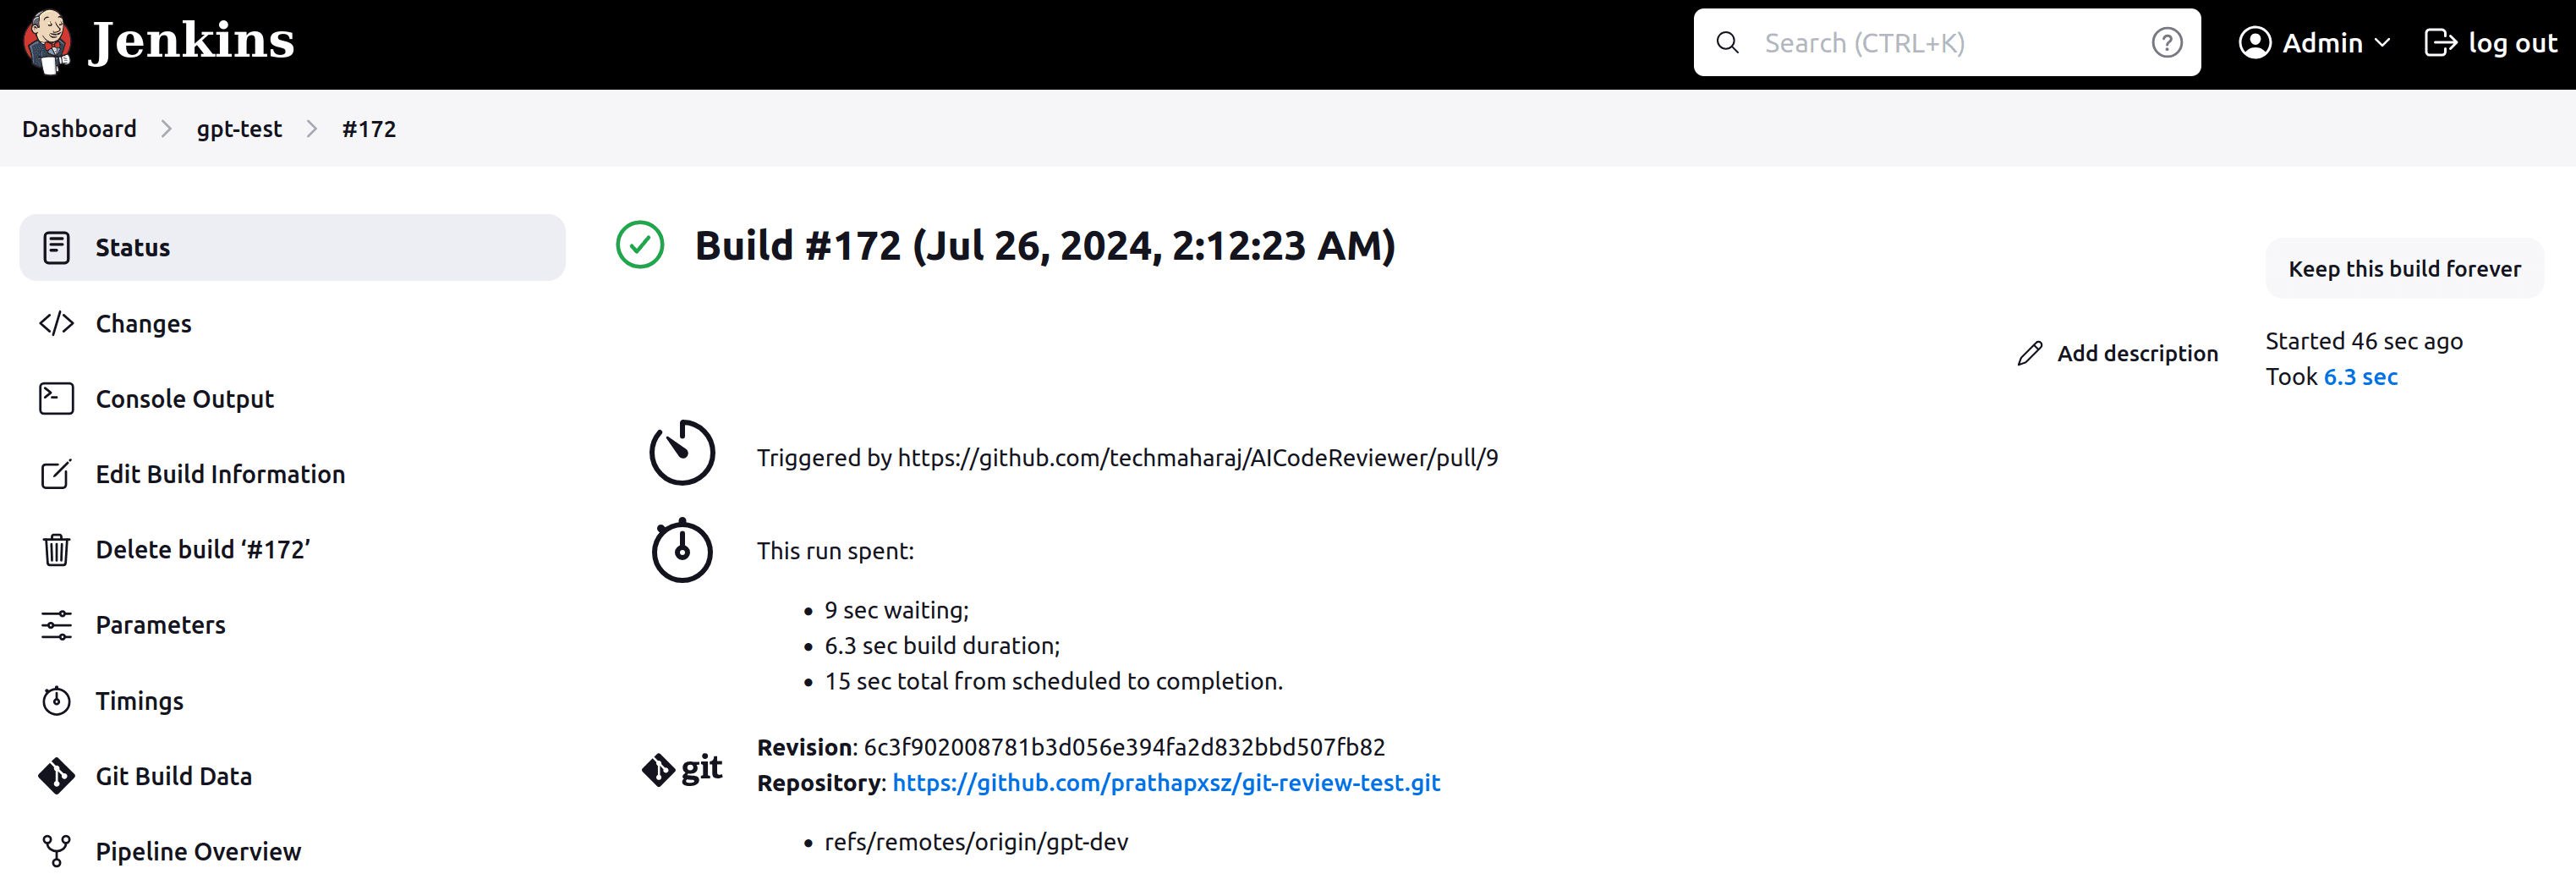
This will trigger the Jenkins build. To view that, navigate to your Jenking dashboard and open the Pipeline.
Click on “Console Output” to see the detailed output of the job.
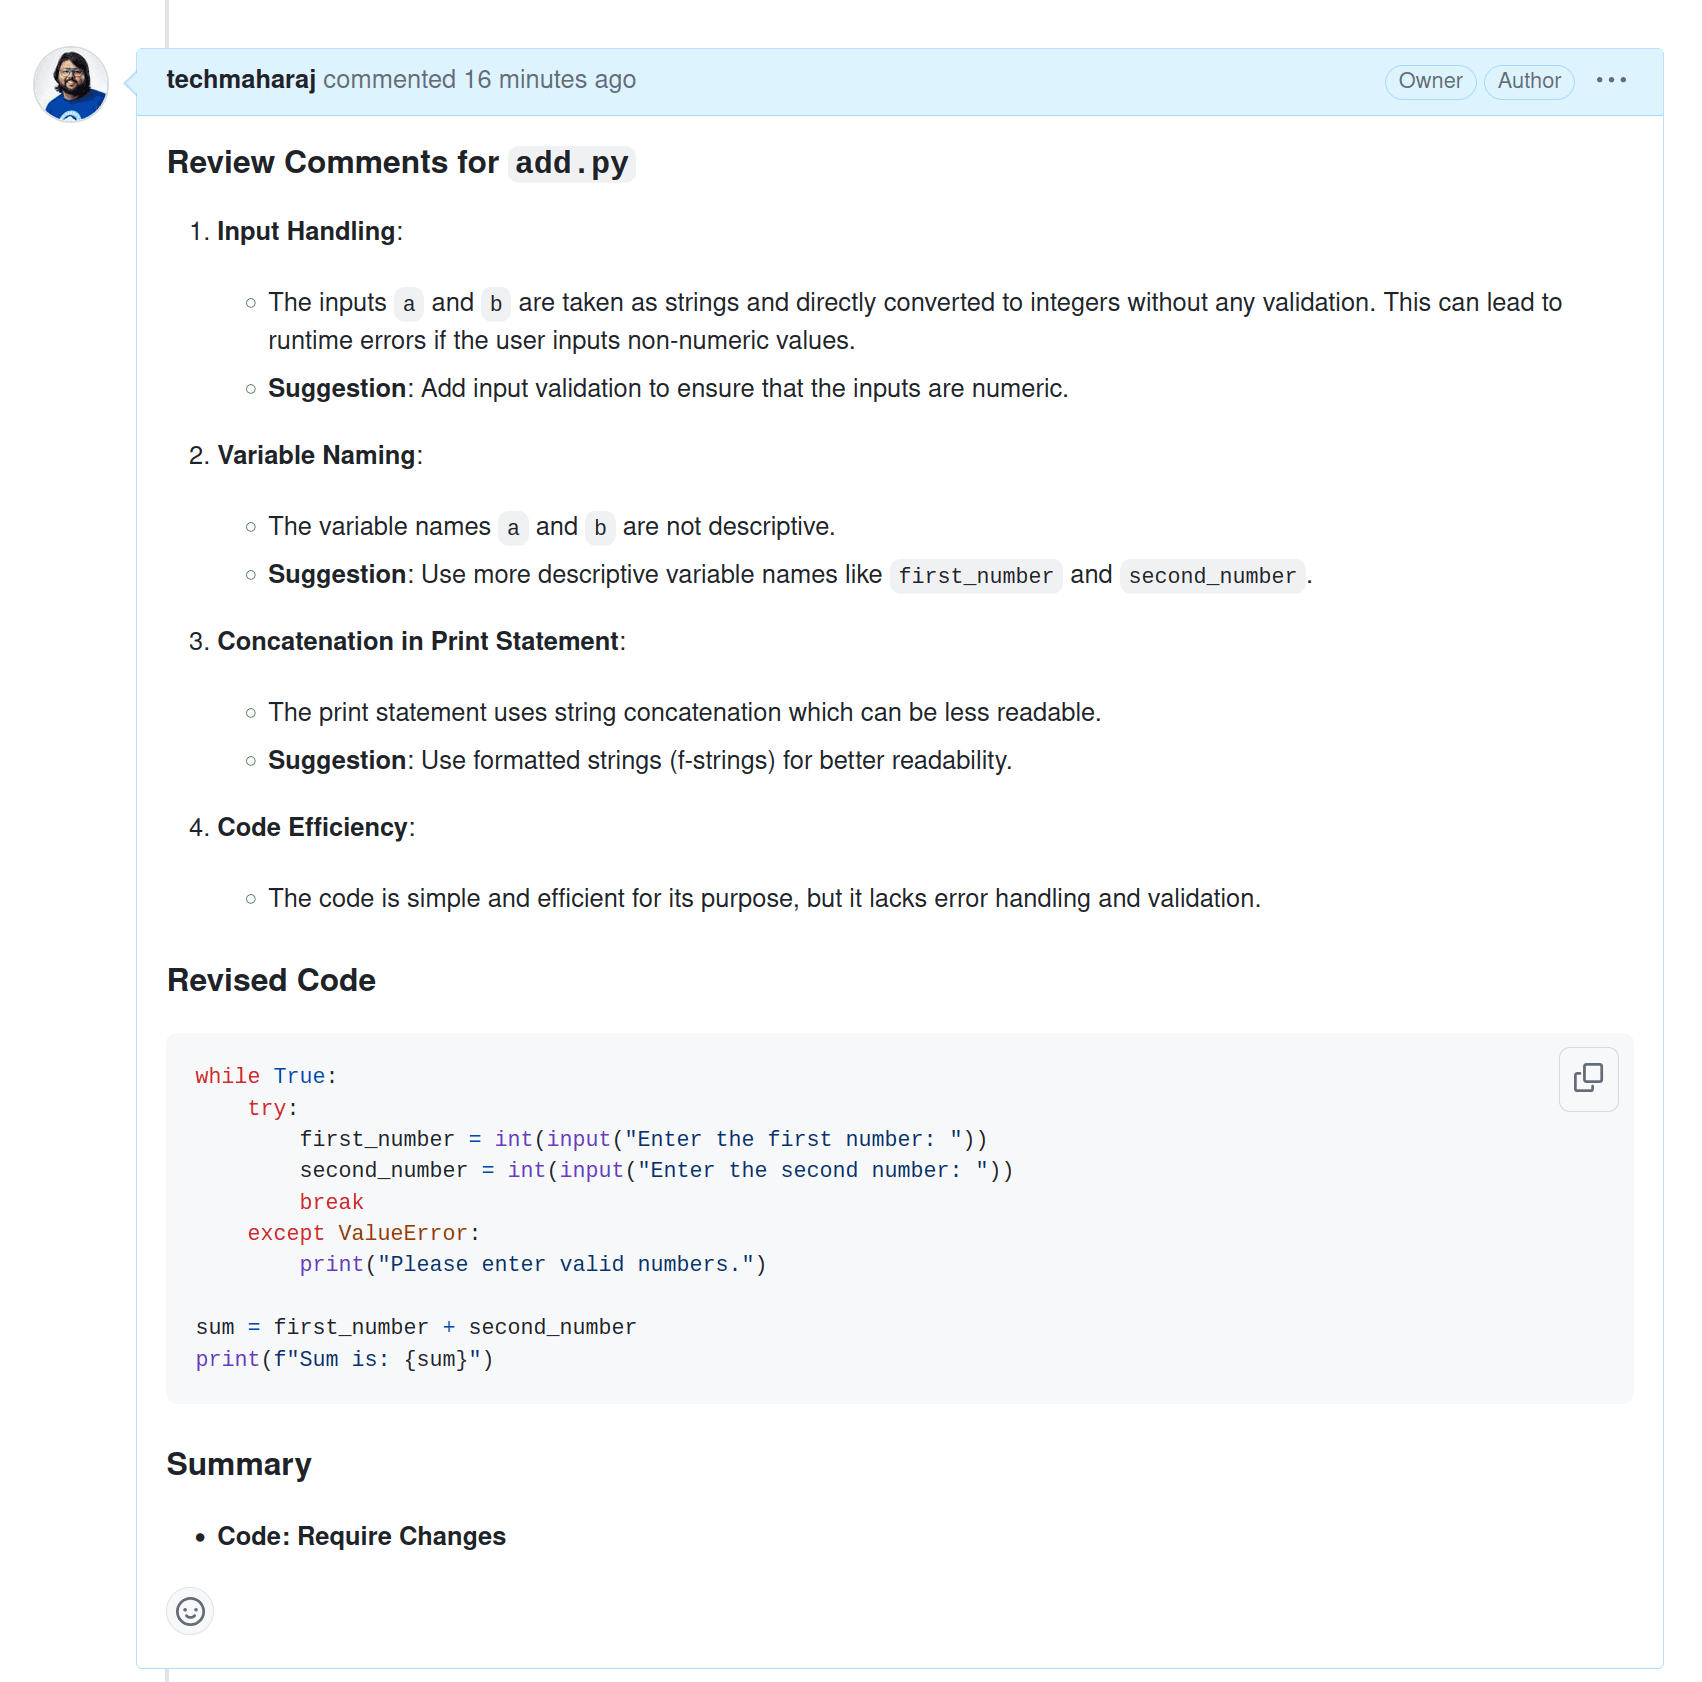
GPTScript checks the details of the PR and realises that there was a new add.py file added. It then reviews the contents of the file. It reviews the code and shares detailed review comments for the file mentioning that the file needs more details.
Hence the code review fails in this case, and the same is posted as a comment on the PR.
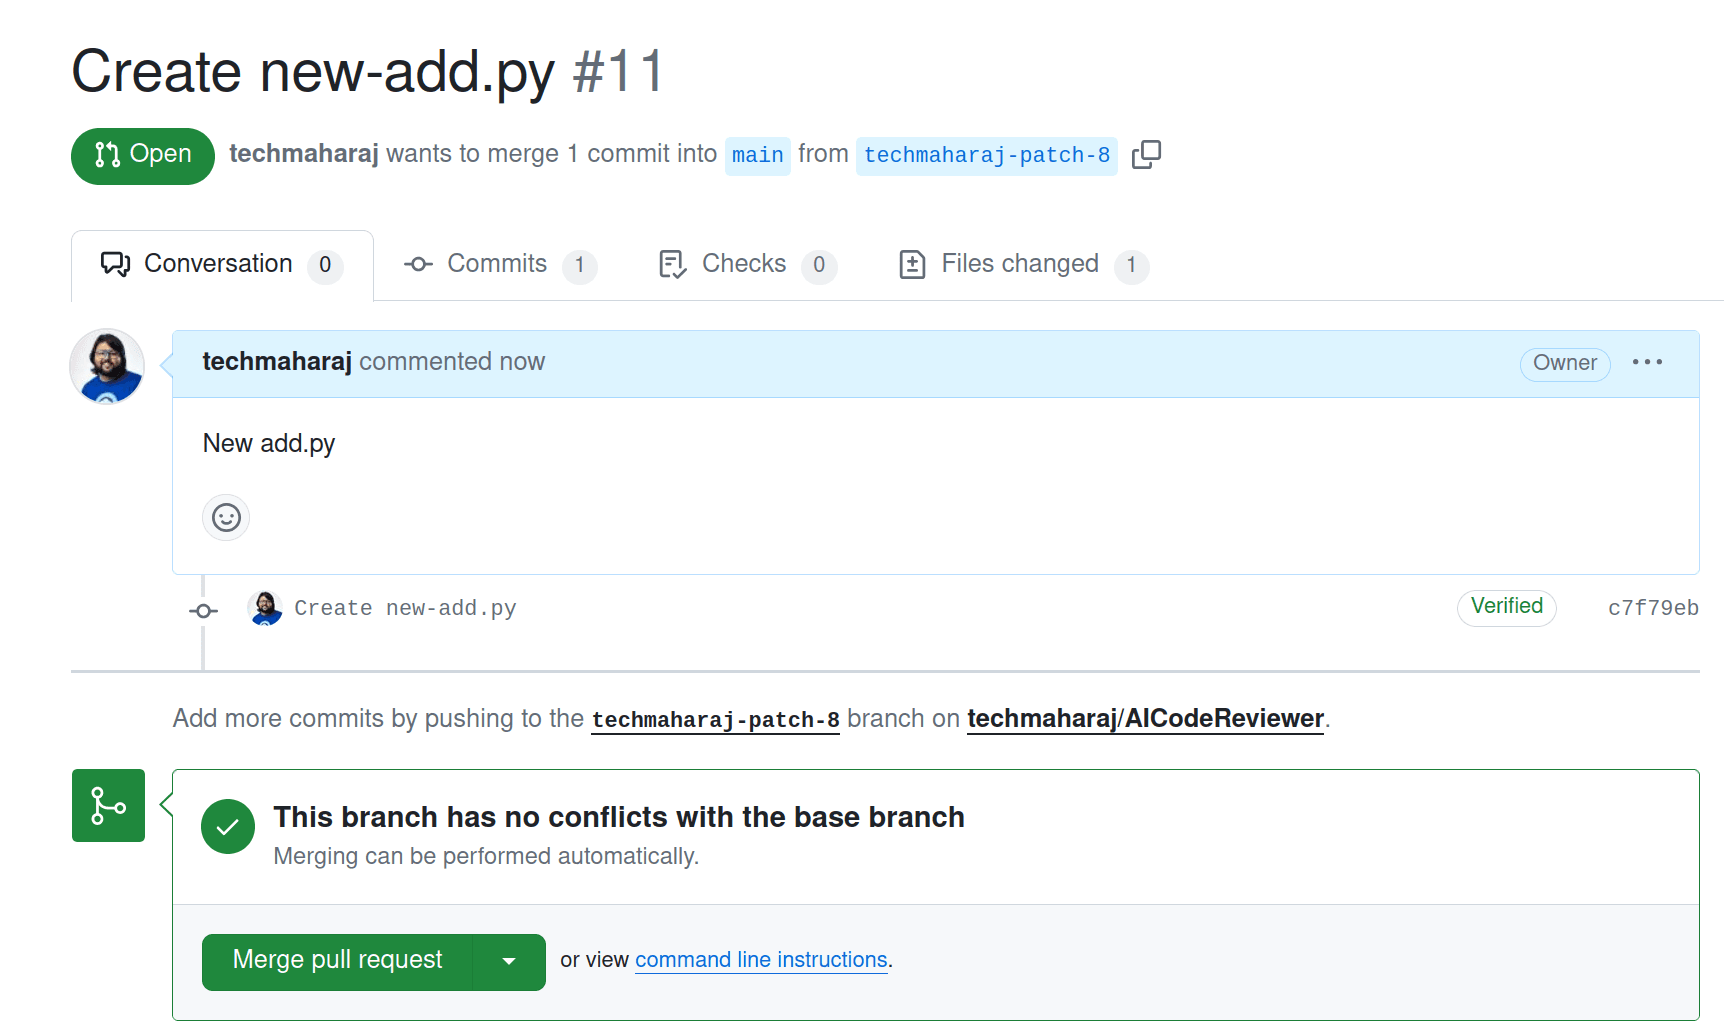
Next, we create a raise PR, this time for the same python file but with a better code.
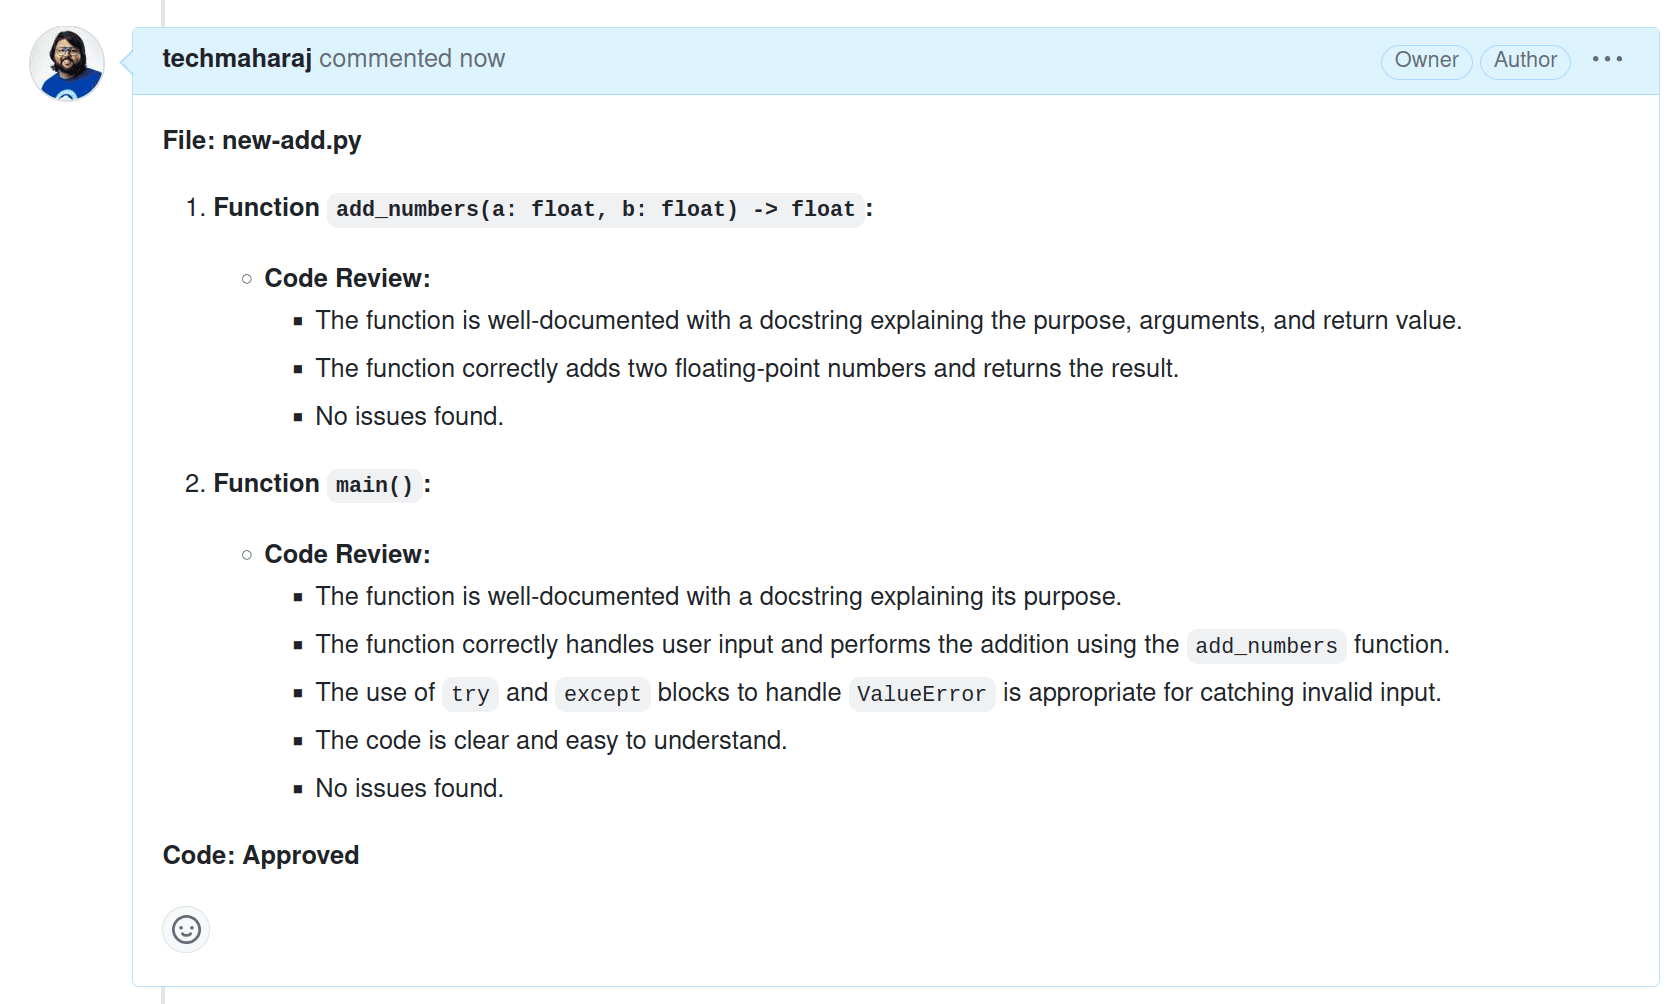
This time, when the GitHub action is triggered, GPTScript analyses the code, and the review passes. The build’s status is marked as pass in Jenkins, and a comment with the review comment is posted.
Using a few lines of natural text, we built GPTReview and performed code reviews for PRs. Integrating that with Jenkins pipeline made it a part of a workflow. So, every time there’s a new PR, GPTReview will perform the code review and update the status.
Summary
This blog post gave an overview of how you can use GPTScript to create an AI-based code review tool and integrate it with Jenkins. Making the code review process part of your development workflows is crucial as it enables faster feedback and removes the scope for manual errors.
Until then, check out GPTScript and try building AI-enabled applications with ease. If you’re new here or need guidance, join the GPTScript Discord server and get all your queries answered.
This tutorial is part of a series on GPTReview, an AI code reviewer built on GPTScript. Check out parts 1 & 3 below.
